
Main Courses
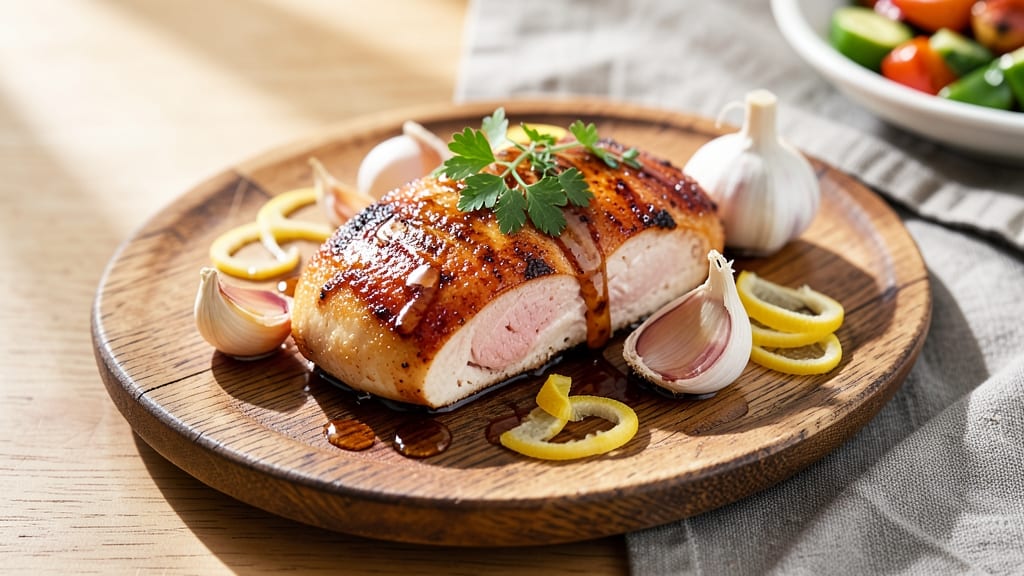
This baked honey garlic chicken breast recipe transforms simple ingredients into a restaurant-quality dish with a caramelized crust that's impossible to resist. 🌟 The secret lies in marinating the chicken for at least 30 minutes, allowing the honey and garlic to penetrate deeply before baking.
This isn't just another chicken recipe—it's a flavor-packed meal that requires minimal effort but delivers maximum impact.
The beauty of this method is its simplicity: no deep-frying, no complicated techniques, just a perfect balance of sweet and savory flavors. The honey creates a sticky glaze that caramelizes beautifully in the oven, while the garlic adds aromatic depth.
What you'll end up with is tender, juicy chicken with a glossy, golden-brown crust that's sure to impress even the most critical eaters.
This recipe is designed to be foolproof, making it ideal for weeknight dinners or special occasions. The flavors are rich and satisfying, yet the preparation is straightforward—no culinary expertise required. Whether you're cooking for family or treating yourself, this dish delivers restaurant-quality results with minimal fuss.
Once baked, the chicken will have a perfectly caramelized crust that's both sweet and savory, with juicy, flavorful meat underneath. Serve it with roasted vegetables, a fresh salad, or your favorite sides to create a complete meal.
The best part? Leftovers reheat beautifully, making this recipe even more convenient for busy schedules.
Ingredients for baked honey garlic chicken breast
Twelve ingredients create a restaurant-worthy honey garlic glaze with caramelized perfection.
| Ingredient | Amount | Notes |
|---|---|---|
| Boneless, Skinless Chicken Breast 🍗 | 1 ½ lb | Even thickness for consistent baking |
| Raw Honey 🍯 | ½ cup | Thick, dark honey preferred |
| Garlic Cloves 🧄 | 6 whole | Minced finely for maximum flavor |
| Soy Sauce 🍶 | ¼ cup | Low-sodium preferred for balance |
| Extra-Virgin Olive Oil 🫒 | 2 tbsp | High-quality for caramelization |
| Fresh Ginger 🌿 | 1 tbsp | Finely grated, fresh preferred |
| Diamond Crystal Kosher Salt 🧂 | 1 tsp | Adjust to taste after baking |
| Ground Black Pepper 🌶️ | ½ tsp | Freshly cracked for aroma |
| Cornstarch 🌾 | 1 tbsp | For glaze thickening (optional) |
| Fresh Rosemary 🌿 | 2 sprigs | For aromatic baking companion |
| Fresh Lemon Juice 🍋 | 1 tbsp | Brightens flavor balance |
| Unsalted Butter 🧈 | 1 tbsp | Cubed for basting (optional) |
The quality of your honey and garlic makes all the difference here. Local raw honey from a farmers market delivers deeper flavor than supermarket varieties, and organic garlic with tight cloves ensures maximum punch. For soy sauce, Kikkoman or Pearl River Bridge provide authentic umami without excessive sodium. Fresh ginger loses potency quickly—buy it pre-grated at Whole Foods if you won't use it all. The chicken breasts should be uniform in thickness (pound any thick spots to 0.5 inches) for even baking. Trader Joe's often carries pre-pounded chicken breasts that save time.
No raw honey? Substitute maple syrup or agave nectar at the same quantity, though the flavor profile will differ slightly. Short on garlic? Garlic powder at half the amount works, but fresh is non-negotiable for that aromatic depth. The cornstarch is optional but creates a glossier finish—skip it if you prefer a more rustic texture. For a deeper savory note, add 1 tsp fish sauce (ensure it's gluten-free if needed). The rosemary sprigs can be swapped for thyme if unavailable, though they'll impart a different character. Always use fresh lemon juice; bottled lacks the brightness needed to cut through the sweetness.
Marinate the chicken for at least 30 minutes (overnight for maximum flavor). Store any unused honey in a cool, dark place for up to 1 year, and keep fresh ginger wrapped in a damp paper towel in the fridge for 2 weeks. The marinated chicken can be refrigerated for 24 hours before baking. Leftovers reheat beautifully—cover with foil and warm at 350°F for 10-15 minutes to maintain moisture. For meal prep, portion into single servings and freeze for up to 3 months; thaw overnight in the fridge before reheating.
Why You'll Love This Recipe
- No-Fuss Prep: I swear, this takes less time than waiting for takeout. Just slice the chicken, toss it in a bowl with honey, minced garlic, and a splash of soy—no fancy techniques, no measuring cups. Honestly, I’ve made it while scrolling through my phone.
- Sweet-Savory Magic: That sticky honey-garlic glaze? It’s the kind of flavor you’ll lick the plate for. The soy adds depth, the olive oil keeps it tender, and the garlic—oh, the garlic—turns this into something restaurant-worthy without the fuss.
- Weeknight Wonder: I’ve served this for date nights, lazy Sundays, and even as a quick lunch when I forgot to meal prep. It reheats like a dream, so it’s my go-to when I need something reliable that doesn’t scream “I spent all day cooking.”
- Budget-Friendly Feast: Chicken breast is cheap, honey lasts forever, and garlic is practically free at the grocery store. Plus, this recipe stretches easily—double the batch, freeze half, and thank me later when you’re not scrambling for dinner ideas.
Step-by-step instructions for baked honey garlic chicken breast
Master this technique and you'll achieve a perfect balance of caramelized crust and tender, juicy meat every time.
👨🍳 Step 1: Prepare the Chicken and Glaze Base
Preheat your oven to 375°F and line a baking sheet with parchment paper. Place the 1.5 lb boneless, skinless chicken breast on the prepared sheet. Using a sharp knife, make 4-6 shallow slits across the top of each breast—this helps the glaze penetrate deeply and prevents curling during baking.
In a small saucepan, combine the 0.5 cup raw honey, 0.25 cup soy sauce, 2 tbsp extra-virgin olive oil, and 1 tbsp fresh lemon juice. Bring to a gentle simmer over medium heat for 3-4 minutes until the mixture begins to thicken slightly. Remove from heat and let cool for 5 minutes—this prevents the chicken from cooking too quickly when you add the hot glaze.
🍳 Step 2: Build the Garlic-Ginger Aromatic Layer
While the glaze cools, mince the 6 whole garlic cloves and finely grate the 1 tbsp fresh ginger. In a small bowl, mix these with the 1 tbsp cornstarch to create a fine paste—this helps thicken the glaze as it bakes. Add this mixture to the cooled glaze and stir until fully combined.
Season the chicken breasts generously with 1 tsp diamond crystal kosher salt and 0.5 tsp ground black pepper, pressing the seasoning into the slits you created. Place the 2 sprigs fresh rosemary on top of each breast for aromatic depth during baking. The rosemary will infuse the chicken with its piney fragrance while adding visual appeal.
🔥 Step 3: Apply Glaze and Bake to Golden Perfection
Using a pastry brush, generously coat both sides of each chicken breast with the garlic-honey glaze. For extra richness, place 1 tbsp cubed unsalted butter on top of each breast. Transfer the baking sheet to the preheated oven and bake for 25-30 minutes.
Here's the key: after 15 minutes, carefully flip the chicken breasts and baste them with the pan juices. Watch for the glaze to begin caramelizing—you'll see it turn from glossy to deep amber with bubbling edges. The chicken is done when the internal temperature reaches 165°F and the glaze has thickened into a sticky, glossy crust. If the glaze sets too quickly, tent with foil for the last 5 minutes to prevent over-browning.
⏰ Step 4: Rest and Serve for Maximum Juiciness
Remove the chicken from the oven and transfer to a cutting board. Let it rest for 10 minutes before slicing—this crucial step allows the juices to redistribute throughout the meat. If you cut too soon, all that delicious moisture will pool on your plate instead of staying in the chicken.
Slice the chicken against the grain into ½-inch thick pieces. The glaze should be thick and sticky, clinging beautifully to each slice. Serve immediately with the pan juices spooned over the top, or drizzle any remaining glaze from the baking sheet. This dish pairs perfectly with steamed jasmine rice or roasted seasonal vegetables to balance the sweet-savory flavors.
Pro Tips For Making Baked Honey Garlic Chicken Breast
- Pound the Chicken First: I learned this the hard way—skipping this step means dry, rubbery chicken. Use a meat mallet or rolling pin to pound breasts to an even ½-inch thickness before baking. This ensures even cooking and better absorption of the honey-garlic glaze.
- Sear the Chicken Before Baking: This isn’t the prettiest method, but it’s the tastiest. After coating the chicken in olive oil and salt, sear it in a hot skillet for 2-3 minutes per side until golden. Transfer to the baking dish—it locks in moisture and adds depth to the flavor.
- Use Raw Garlic, Minced Fine: I was skeptical until I tried it—raw garlic cloves stay too chunky and burn easily. Mince the garlic finely (almost paste-like) and mix it directly into the honey-soy glaze. It blends smoothly and infuses flavor evenly without scorching.
- Bake at 375°F, Not Higher: After burning three batches, I finally figured out that 400°F turns the honey into caramelized sugar too fast, making the chicken dry. Stick to 375°F for 20-25 minutes—it lets the glaze caramelize gently while keeping the meat juicy.
Storing and reheating this dish
Refrigerator Storage
After baking, let your honey garlic chicken cool completely before storing. Place it in an airtight container with a splash of the pan juices to keep it moist. Store in the fridge for up to 4 days—the flavors actually deepen as the glaze absorbs into the meat.
I use glass Pyrex containers because they preserve texture better than plastic. 💪
Freezer Prep Tips
For long-term storage, portion the chicken into single-serving airtight containers with a thin layer of glaze. Freeze for up to 3 months—the honey acts as a natural preservative. When ready to eat, thaw overnight in the fridge, then reheat gently. Avoid microwave reheating to prevent drying out the glaze.
Stovetop Reheating
My preferred method is stovetop reheating. Place chicken in a skillet over medium-low heat with 1 tablespoon water or chicken broth. Cover and heat for 8-10 minutes, basting occasionally.
This maintains the caramelized crust while keeping the meat juicy. Add a splash of honey if the glaze looks too dry. 🔥
Oven Refresh Method
For restaurant-quality results, reheat in the oven. Preheat to 350°F, place chicken on a baking sheet with foil, and warm for 10-15 minutes. The residual heat reactivates the caramelization process, giving you that fresh-from-oven stickiness. Spritz with water before reheating if the glaze looks too set.
Glaze Preservation
Save any leftover glaze in a small glass jar in the fridge for up to 2 weeks. It makes an excellent marinade for shrimp or a drizzle for rice bowls.
If the glaze thickens too much, thin with 1 teaspoon water before using. The cornstarch helps it reheat beautifully without clumping. ✨
Portion Control
Divide leftovers into individual meal prep containers with a side of rice or veggies. This keeps portions balanced and prevents overcooking when reheating. I like using bento-style containers to maintain the honey garlic chicken's presentation. Label containers with dates to track freshness. 📅
Nutrition facts
Frequently asked questions
Can I use chicken thighs instead of breasts?
Yes, but adjust the cooking time! Chicken thighs have more fat and stay juicier, so bake them at 350°F for 35-40 minutes until the internal temperature reaches 165°F. The skin will crisp beautifully, but watch for over-browning—cover with foil if needed. The honey glaze works perfectly with thighs too!
Why is my glaze too runny after baking?
This usually happens if the glaze didn't thicken enough before baking or if the oven temperature was too low. For next time, simmer the glaze for 5-6 minutes to reduce it more, or add 1 extra tablespoon cornstarch to the mixture. If it's already baked, broil for 2-3 minutes to caramelize the excess liquid.
How can I make this gluten-free?
Simply swap the soy sauce for tamari or coconut aminos (use the same 0.25 cup amount). These gluten-free alternatives provide the same umami depth without compromising flavor. Check labels to ensure they're certified gluten-free if needed. The rest of the recipe remains unchanged!
Can I bake this in an air fryer instead?
Preheat the air fryer to 375°F and cook the chicken for 12-15 minutes, flipping halfway. The high heat will create a similar caramelized crust. For extra shine, brush with a little more honey glaze after 8 minutes of cooking. Just watch closely to avoid overcooking!
What's the best way to serve this dish?
This honey garlic chicken pairs beautifully with steamed jasmine rice, roasted broccoli, or a fresh cucumber salad to balance the sweet-savory flavors. For extra presentation, drizzle the pan juices over the top before serving. It also makes a fantastic sandwich filling with some avocado and greens!