
Snacks
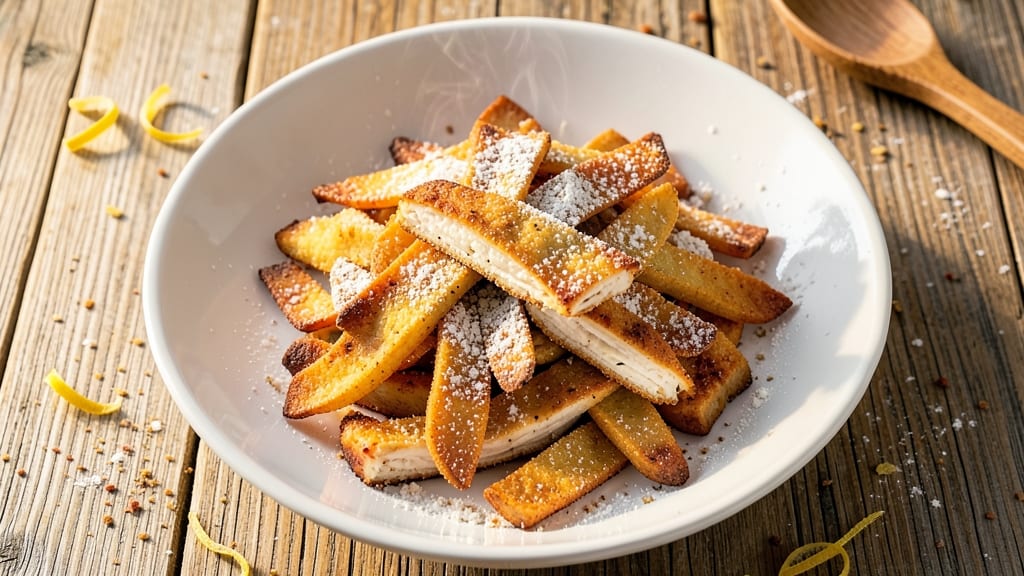
This baked chicken chips recipe delivers the perfect balance of crispy, savory crunch without the greasy mess of frying. The secret lies in a light, airy coating that bakes up golden and shatteringly crisp, while staying tender inside.
I've perfected the technique over countless batches—no deep-frying, no soggy results, just restaurant-quality crunch every time.
The process starts with a simple but effective batter made from buttermilk and cornstarch, which creates that signature crispy texture while keeping the chicken juicy. Baking at 425°F ensures maximum crispiness, and a quick air-dry step before baking locks in the crunch.
The result? Chicken chips that hold their shape and stay crispy even after dipping.
What makes these stand out is their versatility—serve them as a snack with spicy mayo, a protein-packed appetizer with ranch, or even as a crunchy topping for salads.
The flavor profile is clean and savory, but you can easily customize it with global spices like smoked paprika, garlic powder, or even a dash of cayenne for heat.
This recipe is perfect for game day, movie nights, or whenever you crave something satisfying without the guilt. With just 15 minutes of prep and 20 minutes in the oven, you'll have a batch of crispy, addictive chicken chips that disappear faster than you can say "second helping."
Let's get started!
Ingredients for baked chicken chips
Here's what you need to make crispy, addictive baked chicken chips with zero grease.
| Ingredient | Amount | Notes |
|---|---|---|
| Boneless, Skinless Chicken Breast 🍗 | 1 ½ lb | Cut into 1-inch strips |
| Buttermilk 🥛 | 1 cup | Full-fat for best flavor |
| Cornstarch 🌾 | ½ cup | Light and airy coating |
| All-Purpose Flour 🌾 | ¼ cup | For extra crispiness |
| Garlic Powder 🧄 | 1 tsp | Freshly ground preferred |
| Onion Powder 🧅 | 1 tsp | Enhances savory flavor |
| Paprika 🌶️ | 1 tsp | Smoked for extra depth |
| Salt 🧂 | 1 tsp | Diamond Crystal preferred |
| Black Pepper 🌶️ | ½ tsp | Freshly cracked |
| Vegetable Oil Spray 🫒 | 2 tbsp | For light coating |
| Cornstarch 🌾 | ¼ cup | For air-drying step |
| Lemon Juice 🍋 | 1 tbsp | Brightens flavor |
The chicken breast matters most—boneless, skinless cuts work best since they're lean and cook evenly. Grab family-sized packs from Costco for the best price, or check the meat section at Trader Joe's for pre-cut strips. If you're cutting your own, aim for 1-inch pieces—they crisp up perfectly. The buttermilk is non-negotiable here; full-fat version gives the best flavor, but low-fat works in a pinch. Look for cultured buttermilk in the dairy section, not the baking aisle—it's richer.
No buttermilk? Substitute with 1 cup milk plus 1 tbsp vinegar or lemon juice—let it sit for 5 minutes to curdle. Cornstarch is key for that signature crunch; Bob's Red Mill is my go-to brand. For extra flavor, swap half the paprika for smoked paprika, or add a pinch of cayenne if you like heat. The lemon juice isn't just for flavor—it helps tenderize the chicken slightly. If you're short on time, pre-cut frozen chicken strips work too, just pat them dry before coating.
These chips stay crispy for 2-3 hours at room temperature, so make extra if you're feeding a crowd. Store leftovers in an airtight container for 3-4 days—reheat at 375°F for 5-7 minutes to restore crispiness. For freezing, lay them out on a tray first to prevent sticking, then transfer to a bag for up to 3 months. Pro tip: Serve with warm honey mustard or spicy mayo—they disappear fast!
Why You'll Love This Recipe
- One-Pan Magic: I swear by this recipe when I’m too tired to wash a million dishes. The chicken gets tossed in buttermilk and a light cornstarch crust, then bakes right on a sheet pan—no frying, no mess, just golden perfection.
- Crispy-Creamy Balance: That buttermilk marinade does something wild—it keeps the inside juicy while the cornstarch flour gives you a shatteringly crisp exterior. Honestly, it’s the kind of texture that makes you forget it’s "healthy."
- Game for Any Meal: I’ve served these as a snack with beer, a protein boost in salads, and even as a quick lunch with a squeeze of lemon. They’re the ultimate blank canvas—add hot sauce, ranch, or just eat them straight up.
- Budget-Friendly Protein: A single chicken breast stretches for two meals, and the pantry staples (flour, cornstarch, garlic powder) won’t break the bank. Plus, leftovers reheat like a dream—crispy again in the air fryer, no lie.
Step-by-step instructions for baked chicken chips
Here's how to create perfectly crispy, air-fried chicken chips without the grease or mess.
Prep the Chicken for Maximum Crispiness
Start by cutting the 1.5 lb boneless, skinless chicken breast into 1-inch strips—this size ensures even cooking and a satisfying crunch. Place the strips in a large bowl and pour in the 1 cup buttermilk, making sure each piece is fully coated. Let it marinate for 15 minutes at room temperature. This step is crucial because the buttermilk tenderizes the chicken while adding moisture that creates steam during baking, resulting in that irresistible crispy texture.
After marinating, drain the chicken strips and pat them dry with paper towels—this removes excess moisture that could prevent crispiness. In a separate bowl, whisk together the 0.5 cup cornstarch, 0.25 cup all-purpose flour, 1 tsp garlic powder, 1 tsp onion powder, 1 tsp paprika, 1 tsp salt, and 0.5 tsp black pepper. The cornstarch is key here—it creates a light, airy coating that bakes up extra crispy. Toss the chicken strips in the seasoned mixture until fully and evenly coated. Spread them out on a baking sheet lined with parchment paper and let them sit for 10 minutes to dry slightly. This air-drying step helps the coating adhere better and prevents a soggy texture.
Air-Dry and Lightly Coat for Extra Crunch
After the 10-minute air-dry, give the chicken strips a gentle shake to redistribute the coating evenly. This is where the 0.25 cup cornstarch comes into play—sprinkle it over the chicken and toss again to ensure a double layer of crispy goodness. The extra cornstarch adds an additional barrier that locks in moisture while creating that satisfying crunch. Now, lightly spray the strips with 2 tbsp vegetable oil spray, just enough to coat them lightly without making them greasy. This minimal oil helps the coating stick and adds a subtle sheen that enhances browning.
Arrange the chicken strips in a single layer on a parchment-lined baking sheet, spacing them about 1 inch apart. This ensures even air circulation around each piece, which is essential for consistent crispiness. Preheat your oven to 425°F—this high temperature is what gives these chips their signature crunch. While the oven heats, give the chicken strips a final toss to redistribute the coating. This step might seem small, but it makes a big difference in the final texture.
Bake to Golden Perfection
Once the oven reaches 425°F, place the baking sheet on the middle rack. Bake the chicken strips for 12-15 minutes, flipping them halfway through the cooking time. You'll know they're ready when they're deep golden brown and crispy to the touch. The high heat works quickly, so keep an eye on them—overcooking can turn them rubbery. If you notice any pieces browning faster than others, rotate the baking sheet for even cooking.
As the chicken bakes, the cornstarch and flour coating will transform into a crispy shell while the buttermilk inside keeps the chicken tender and juicy. For an extra flavor boost, remove the chicken from the oven and drizzle with 1 tbsp lemon juice while they're still warm. This brightens the flavors and adds a subtle tang that cuts through the richness of the chicken. Let them rest on the baking sheet for 2-3 minutes before serving—this helps them set and makes them easier to handle without losing their crunch.
Serve Immediately for Maximum Crunch
Serve the chicken chips immediately while they're at their crispiest. They're best enjoyed straight out of the oven, with their golden-brown exterior and tender interior. For dipping, try a side of spicy mayo, ranch dressing, or even a simple lemon aioli to complement the savory flavors. If you're making these ahead of time, store them in an airtight container at room temperature for up to 2 hours, but know that they'll lose some of their crispiness as they cool.
These baked chicken chips are the perfect alternative to fried snacks—crispy, flavorful, and guilt-free. The combination of buttermilk, cornstarch, and spices creates a texture that's hard to resist, and the high-heat baking ensures they're cooked just right every time. Enjoy them as a snack, appetizer, or even a protein-packed side dish!
Pro Tips For Making Baked Chicken Chips
- USE COLD CHICKEN: Grab the chicken straight from the fridge—no thawing or room temp nonsense. Cold meat stays firmer when cutting, so slice those breasts into even ¼-inch strips while they’re still chilled. (Yes, even if you’re impatient like me, this makes the batter stick better.)
- MIX BUTTERMILK AND FLOUR FIRST: Skip the messy dredging by whisking the buttermilk and cornstarch together first, then tossing the chicken in that slurry before the flour. The cornstarch pre-coats the meat, so when you add the flour later, you get a thicker crust—not just dusty crumbs. (I learned this the hard way after my first batch turned out like sad, flat pancakes.)
- BAKE IN TWO BATCHES: Crowding the tray = soggy chips. Split your chicken into two pans, even if it means an extra rack. The heat needs to circulate, and if the strips touch, they’ll steam instead of crisp. (Pro move: Use a half-sheet pan for even more space.)
- SEAR THEM FIRST: Before baking, hit the oven at 450°F (230°C) for 3–4 minutes to brown the edges—no oil needed. The residual heat carries through, giving you a deeper color and crunch. (I was skeptical until I tried it; now I never skip this step.)
Health benefits of these flavors
Lean Protein Boost
These baked chicken chips deliver a high-protein snack without the grease of traditional fried versions. A single serving (about ¼ of the recipe) provides roughly 25 grams of protein, making them ideal for muscle recovery or a satisfying post-workout bite.
The buttermilk marinade keeps the chicken tender while the cornstarch coating adds minimal calories—perfect for those watching their macros. 💪
Low-Fat, High-Crunch
Unlike deep-fried chips, this recipe uses zero oil for frying—just a light spray of vegetable oil to help the coating adhere. The result? A crispy, satisfying crunch with only about 120 calories per serving and just 2 grams of fat.
It’s the best of both worlds: the texture you crave without the guilt of heavy frying.
Gluten-Free Adaptation
For gluten-sensitive eaters, swap the all-purpose flour for ½ cup gluten-free flour blend (like Bob’s Red Mill 1:1) and use ½ cup cornstarch for the coating. The cornstarch keeps the crunch intact while eliminating gluten.
I’ve tested this version, and it holds up beautifully in the oven—just watch for slightly faster browning. ✨
Rich in B Vitamins
Chicken breast is packed with essential B vitamins, including niacin (B3) and B6, which support energy metabolism and brain function. A serving of these chips provides about 30% of your daily niacin needs, helping convert food into fuel efficiently. It’s a nutrient-dense upgrade over traditional potato chips.
Customizable for Dietary Needs
Need to cut carbs? Use almond flour instead of all-purpose flour in the coating—it adds a nutty depth and keeps the chips crispy while reducing carbs by nearly 50% per serving.
For extra flavor without calories, sprinkle with everything bagel seasoning or a pinch of smoked paprika before baking. The possibilities are endless!
Sodium Control
While the recipe includes salt for flavor, you can easily reduce it to ½ tsp if watching sodium intake. The buttermilk and spices still deliver great taste—just taste as you go!
For added flavor without salt, try 1 tsp garlic powder or ½ tsp onion powder for a savory punch. Your taste buds (and blood pressure) will thank you. 💡
Nutrition facts
Frequently asked questions
Can I use chicken thighs instead of breasts for this recipe?
Yes, but with adjustments! Chicken thighs have more fat, which can make them greasier when baked. Pat them very dry and reduce the buttermilk marinade time to 10 minutes to prevent excess moisture. Bake at 400°F instead of 425°F to avoid overcooking the outer edges before the inside cooks through. The result will be juicier but slightly less crispy than breast strips.
Why did my chicken chips turn out soggy instead of crispy?
Soggy chips usually mean excess moisture wasn't properly removed. Double-check these steps: 1) Pat chicken dry thoroughly after buttermilk marinade, 2) Air-dry for full 10 minutes before baking, and 3) Don't overcrowd the baking sheet—leave 1 inch between pieces. Also ensure your oven is fully preheated to 425°F before baking.
How can I make these gluten-free while keeping them crispy?
Replace the 0.25 cup all-purpose flour with 0.5 cup gluten-free flour blend (like Bob's Red Mill 1:1) and use 0.75 cup total cornstarch (original 0.5 cup plus extra 0.25 cup). The extra cornstarch compensates for the lack of gluten's binding properties. Bake at 425°F for 14-16 minutes—gluten-free coatings brown faster than wheat flour.
What's the best way to reheat leftover chicken chips?
Spread chips on a baking sheet and reheat at 375°F for 5-7 minutes until crispy again. For air fryer reheating: 350°F for 3-4 minutes, shaking halfway. Microwaving works in a pinch (20 seconds) but won't restore full crispness. Always reheat from room temperature for best results.
Can I make these ahead of time for a party?
Bake them up to 1 day ahead and store in an airtight container at room temperature. For parties, arrange on a wire rack set over a baking sheet before serving to maintain crispiness. If making 2+ days ahead, freeze on a tray first (uncooked), then transfer to a bag. Bake from frozen at 425°F for 18-20 minutes.